
Saturday 25 April 2015
Salute treasure........
Picture of everything I picked up at salute today. As always for me a mixed across all my current projects. Ranging from some steampunk/victorian figures, 6 mm buildings and German IG's. Tree stumps and Nazi Zombies for a future project...the one after the one after the one I am currently working on.
Nothing to do with Salute !
Just about to post a photo of the stuff I picked up at salute today and realised I hadn't put a picture up of my most recent painted figures. I have definitely become sidetracked from my original three goals for the start of the year. Here are some more figures for In Her Majesty's Name and or VBCW which I am now close to being able to run.


Don't look at the painting too closely these are not great. I have in mind a gentlemans club and or hunting companions together with the Lord's servants. I have several other figures from my previous victorian misadventure game.
The Cream from Salute....?
Well had a fantastic (long) day out in London at Salute 2015, actually it is not bad if you book in advance and are prepared to get an early train. Yes I bought loads of stuff which will hopefully get painted and on the table soon. Met some great people and played some fun games, but I think what sets salute apart for me is the effort people go to to put on impressive and inspirational games. I only took photos of a few but for me they were probably the 'cream' others were great but there were a lot.
 These top few were from the 1392 Stockholm battle.


Saturday 18 April 2015
The Uman Kessel : Breakout at Monastyrysche
The second battle in our Uman Kessel campaign covers the attempt by the Russian 6th Army to Break out of the encircling XLVIII Panzer Corps. The battles took place between the 21st and 27th July 1941. As always we have had to slim things down to make them manageable. So we have focussed on the 24th Mechanised Corps under MajGen Christyakov made up of the 216th Motorised Division and the 45th and 49th Tank Divisions. Attempting to force a passage through the 16th Panzer Division under GenMaj H Hube.
 |
| Initial view of the battlefield Monastyrysche in the foreground |
 |
| Turn 2 Panzers have pulled back to avoid bombardment |
 |
| German motorised infantry dug in around town. Two Stug III in support |
 |
| Russian heavy tanks attack on the German right flank |
 |
| Things getting hot Anti-tank gun in the trees on the right knocked out by artillery barrage. |
 |
| Motorised infantry being held up by accurate suppressing fire |
 |
| Russian armour pushing through in the centre of the battlefield in the distance heavy Russian Tanks are forcing the 2nd Panzer Battalion back but the Germans are taking losses |
 |
| My favourite shot of the battlefield |
 |
| End point of the battle |
Wednesday 15 April 2015
Battle for the Iron Mountains
Somewhere in the far and frozen North of Naggaroth the Dark Elves have allowed the Orcs to breed and multiply, partly no doubt as they make quite good sport for young Dark Elf warriors to train on but also as they help protect their borders from invaders from the far north.
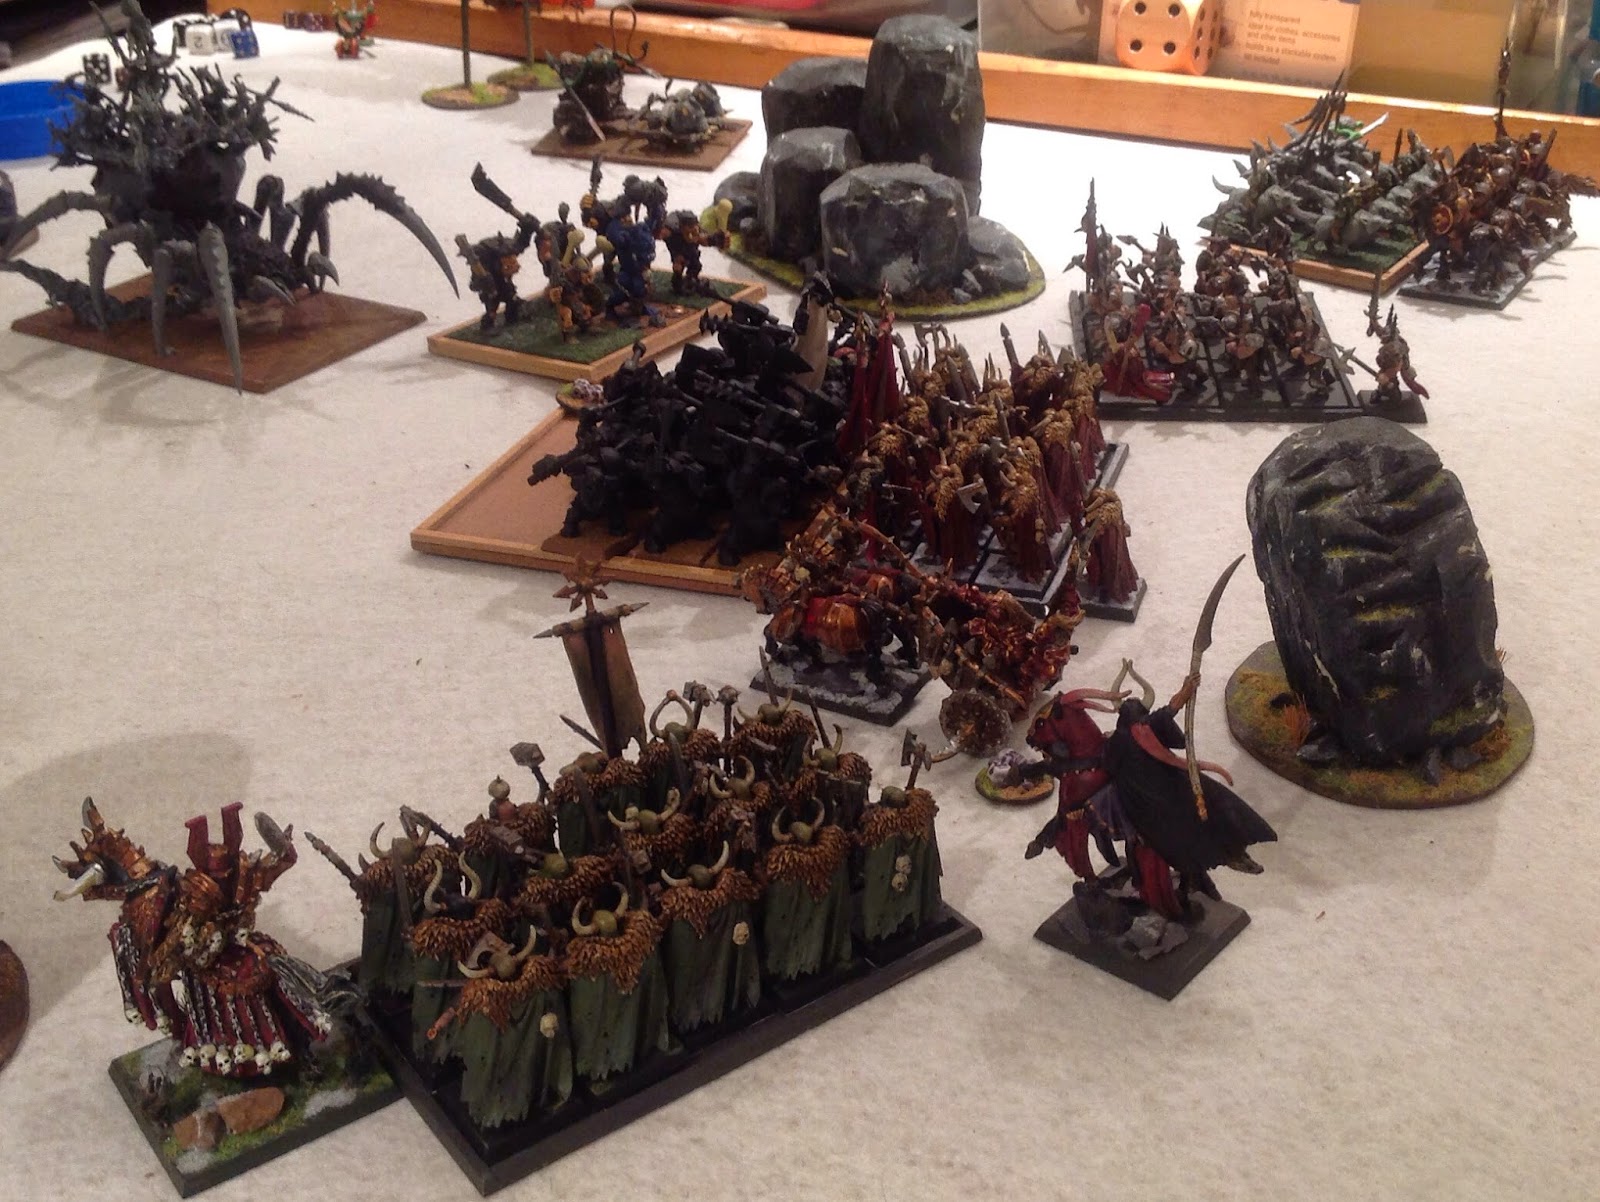
The Iron Mountains is one such place where Orc and Goblin numbers have grown beyond number and it was here that the last Chaos incursion took place. Lord Khrogral had come down from the Ice fields of the north with a small retinue of warriors, having picked up additional troops on his journey including chaos ogres and a Snow Giant from the Ice Mountains he ventured south into Naggaroth. It was here on the Iron Frost Glacier that his first battle with the Greenskins took place.
The Green skins definitely outnumbered the Chaos Hoard but Lord Khrogral knew his troops were hardened by whip and ice. One to one they should prove an equal match.
Despite taking some damage from stone throwers and insane exploding goblins hurdled through the air Chaos were confident they could push the Greenskins back. Little did they know. Khrogral called his sorcerers to the front and in a near fluke the Orc General almost died in a swirl of mist and shadow. Unfortunately he was protected by some shaman ward, survived and was able to charge his elite black orcs into combat. Cutting clean through the chaos battleline !
Suddenly things weren't looking so good, on the Chaos left flank the two giants crashed into each other with the Chaos Ogres supporting. This should have been a fairly easy contest for chaos but somehow the Snow Giant simply yelled at the Orc Giant before being smashed to the ground dead.
Things from here turned from bad to worse, the Chaos Knights were able to regroup and finish off a large unit on the left flank but this was a side show to the main battle on the right. The black orcs and the giant spider were making mincemeat literally of the chaos marauders and remaining warriors. Summoning all the power of dark magic the sorcerer Lord Kraktov was able to kill the Greenskin warlord (he must have had a name but the Chaos scribes forgot to write it down), but the Orcs fought on despite this, their green blood boiling with anger.
The final combats saw the Daemon Hellcannon (it had already misfired and devoured its own handlers) wiping out the wolf riders but the main damage was already done, despite some more magic the Orc giant couldn't be killed and the remaining warriors were eaten and trampled by the giant (grey) spider. At this point Lord Khrogral chose to leave the battlefield. He would be back with a stronger force.
Our plan is to play three linked battles this being the first the next will see them fight over the Altar of Ultimate Darkness a place renown for dark magic. Chaos are going to need it as they were thoroughly slaughtered this time, the snow thick with their blood........
 |
| Lord Khrogral of the North (the snow giant must have arrived late !) |
 |
| Two armies face off across the glacier, the broken ice flows would be dangerous terrain so best avoided |
 |
| Two battle lines close |
 |
| Lord Khrogral on the Right flank |
 |
| The clash and crush of bodies on the right flank. |
 |
| Black Orcs cut through the Chaos battleline |
 |
| Snow Giant has been smashed and the mercenary Orc giant is just turning on the chaos Ogres to finish them off |
 |
| The final combats |
Our plan is to play three linked battles this being the first the next will see them fight over the Altar of Ultimate Darkness a place renown for dark magic. Chaos are going to need it as they were thoroughly slaughtered this time, the snow thick with their blood........
Tuesday 14 April 2015
Normans and Anglo-Danes face off......
Have been playing SAGA almost since it came out but only since Lion Rampant have I had the makings of a Norman warband and after the first skirmish a couple of weeks ago we had another chance to try them out face to face with the Anglo-Danes. Neither warband is easy to use so not recommended unless you have a bit of experience.

The challenge with the Norman faction seems to be that the strengths of the board are very focussed around cavalry and shooting but shooting with bows rather than cross-bows, which are one of the key troop types the Normans can take. What that means is the Norman infantry are fairly limited in their uses. Now as my warband is very much an adaptation of my Lion Rampant retinue it became clear they probably don't make the strongest SAGA warband.

Anyway having not played for a while we set up a straight forward battle, but as always quite a bit of terrain, some small woods and a notable impassable hill/cliff which would undoubtedly hamper the Norman Knights.

It was clear from the start that both sides were going to be fairly cagey small units of elite troops have a tendency to burn out quickly so need to be used with care. The Normans spread out pretty much across the baseline but with the strongest elements on the right flank.


Thursday 9 April 2015
Another macedonian captain ........
In the lull between Easter gaming, tidying up (and decorating a bedroom!) and planning the German invasion of Russia here is another Macedonian Captain can you have too many I wonder ?

Tuesday 7 April 2015
Rampant Hobbits - Lion Rampant LOTR Volume 2
So onto the battles...the original plan had been for each retinue to play three battles and then an all in good versus evil finale. But as it turned out fierce competition in the first round meant we massively over ran. So it was two battles each then the decider. The scenarios were slightly cut down versions of those from the rulebook
Order of battle then
Amazingly after two really tight scenarios which took well over an hour to play we judged both to be pretty much a draw, so onto the second set of battles
Now you might like to have seen move of these excellent two battles but the best laid plans meant that both of the second games were over in less than half and hour, Gondor capturing the Tabacco easily, not sure they failed any activation rolls at all and just swept Isengard away ! In the pother battle the Mordor Orcs found the Mushrooms immediately (not unlucky there !) and ran for it before the Rohan retinue was even in the saddle ! So onto the main event.....
Sorry readers a bit of a photo gap/time lapse here.......must have been the excitement
Order of battle then
Rohan vs Isengard - Run Hobbit Run
where the Rohan retinue had to escort their Hobbit from one corner to the opposite whilst Isengard sought to stop them at all cost.
Gondor vs Mordor - Unexpected Party
where the two retinues seek to get across from corner to corner, meeting unexpectedly the enemy on the way.
Isengard vs Gondor - The Last of the Old Toby
where the Orcs seek to protect Sarumans' last stash of Old Toby Tabacco
Rohan vs Mordor - Mushrooms for Breakfast
where the Mordor Orcs tried to find mushrooms in a series of crates across the battlefield while Rohan try to stop then (ok this one was a bit odd!)
Good vs Evil - Bloodbath
48 points on each side trying to slaughter as many as possible and if possible rescue or kill as many hobbits as possible.
So how did it play.......with so much going on I can't cover it all so it will be pictures with captions, where you can see the full table it is actually split by a row of buttons so each table was about 4'x5'
 |
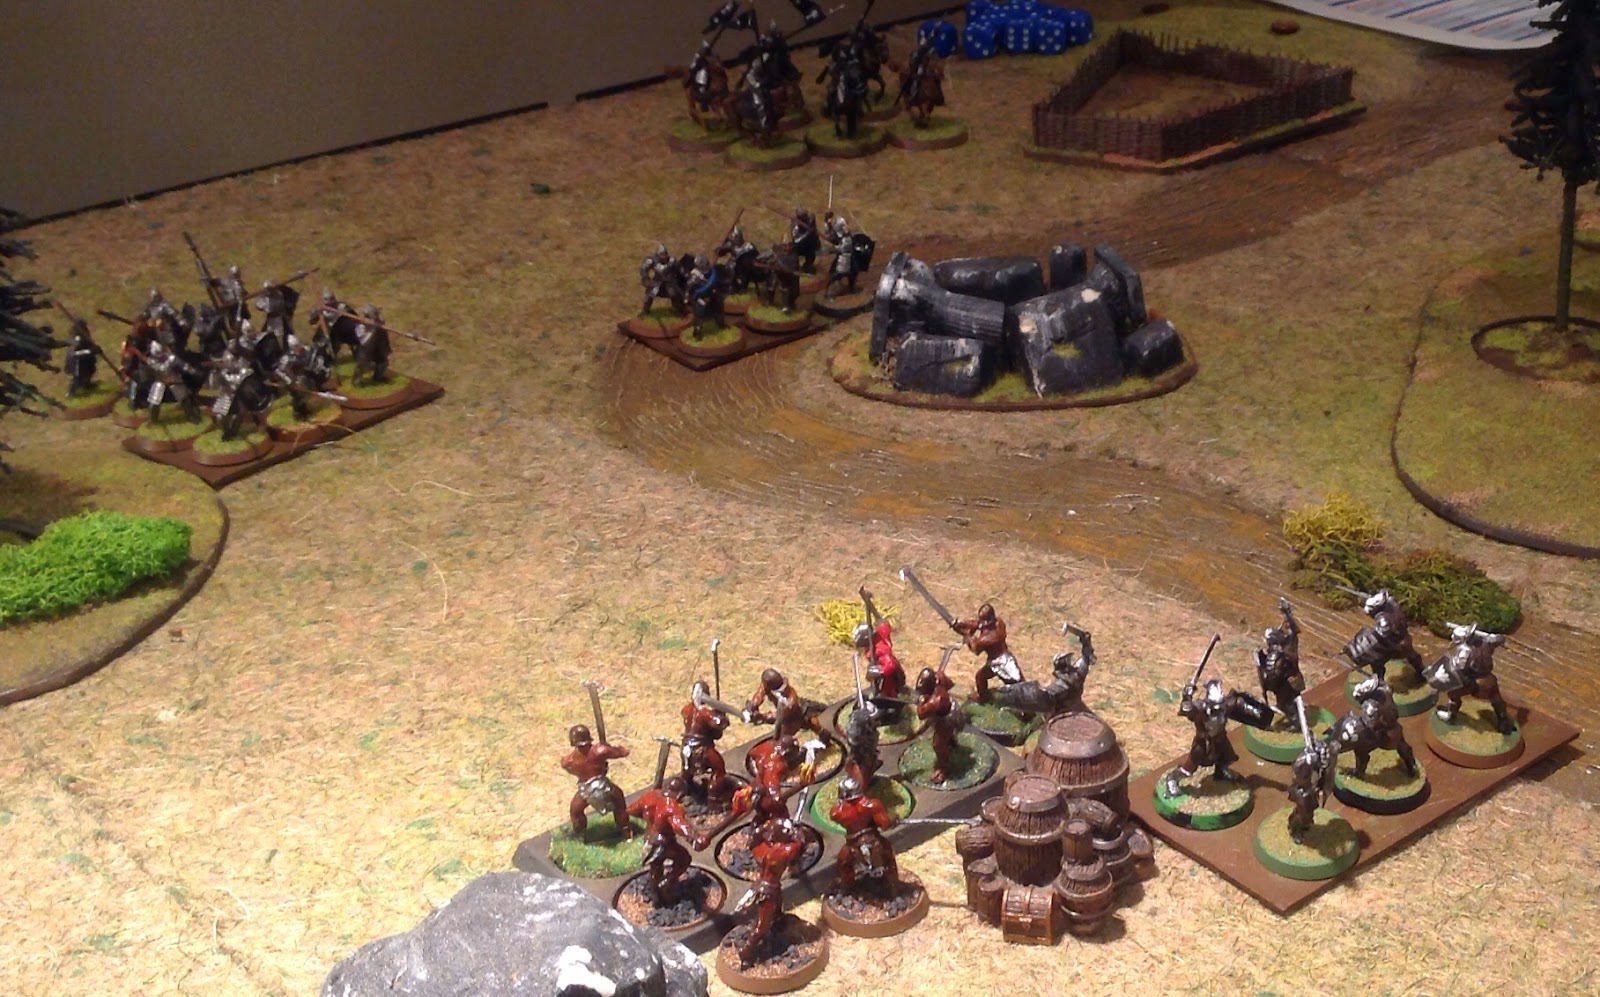
| Isengard Berserkers and Uruk hai close the gap on Rohan out of shot right, whilst in the distance Mordor match up against Gondor |
 |
| Rohirrim cavalry ride out to meet the foe only to be cut down the all important Hobbit is hiding at the back ! |
 |
| Definitely an unexpected party, the challenge with this scenarios as in the rule book is to get past the enemy |
 |
| Finally the Uruk hai can see a Hobbit and chase through the trees to get at him |
 |
| Anyone for a picnic - it all got a bit bloody |
 |
| Bersekers prepare to give their lives to protect Sarumans' Tobacco |
 |
| In the distance you can just see the crates of food the Mordor Orcs are trying to get into ! |
 |
| Looks to me like the bersekers are fighting each other (good job Boromir didn't notice we were far to close together) |
 |
| We have shrunk the battlefield a little Isengard as usual rushing out to their doom but at least keeping their captive hobbit at the back. |
 |
| Mordor doing like wise....but what is that in the middle Rohan cavalry charging out most unlike Eomer ! |
 |
| That's more like it goodies skulking in the woods and shooting form a distance. |
 |
| Lurtz has an uncanny knack of failing activation rolls ! |
 |
| Finally he gets his Uruk's moving forward, whilst the wargs head off through the woods |
 |
| Rushing to near the end, Uruk's have got across the table and are chasing down one of the hobbits, they finally get him, the witch-king and his orcs have been gradually whittled down by arrow fire and the berserkers keep bouncing off the Gondor Sarjeants in Schiltron. From here with most of the Rohan cavalry slaughtered, but Mordor pretty much gone as well, the Gondorian pushed across the battlefield to even up the Hobbit scores. |
By now it was time for the Hobbits to have second Supper so the battle was declared a victory to the good guys. All that was left was to tally up the overall scores. Overall victory to Boromir with 14 points made up of two Battle wins and four Hobbits. Closely followed by Rohan and not so closely followed by Mordor. Some where near the back was Lurtz with no wins but at least Hobbit was back on the menu.
What did we learn, Lion Rampant easily converts to LOTR. Berserkers nee fierce foot are rubbish, in the second scenarios the objective needed to be further away and if you keep rolling rubbish you lose whatever the game.
Subscribe to:
Posts (Atom)